My Dinan M3
Contents:
Stats,
Round 1,
Quickie,
Round 2,
Round 3,
Round 4,
Bits 'n' pieces,
Miscellaneous,
Visual Changes,
What's next,
Pictures,
Videos (NEW!),
Links
Year/Make/Model:   1995 BMW M3
Tuned by:          Dinan (and me!)
Stock Power:       240HP/238 ft. pounds
Dinan Power:       284HP/274 ft. pounds (estimated)
Purchase price:    $32,000 (October 1997)
Mods to date:      Approx $10,000
Suspension:        Dinan Stage 4 with both strut and shock tower braces,
                   Steif X-brace
Intake:            Dinan Cold-air setup with K&N filter, euro AFM, Dinan
                   bored throttle body
Chip:              Dinan Stage 3 with high-flow fuel regulator
Exhaust:           Dinan exhaust manifold, Dinan cat-back exhaust
Brakes:            Slotted Euro-Rotors in front, slotted stocks in back,
                   steel-braided kevlar lines, Ate SuperBlue fluid
Miscellaneous:     Korman Short-Shift kit, Auto-Power 6pt harnesses,
                   camera-mount, Red Line lubricants
Round 1 - Chip And Intake:
I got the car in October 1997 from
Stevens Creek BMW
here in the Silicon Valley.
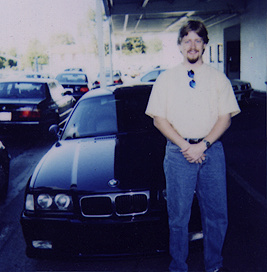
Here's a picture of me after polishing off the
rest of my savings.
Almost immediately I made a trip to Dinan in Mountain View and picked up the
stuff for my initial round of modifications (who needs money, after all?).
These included:

 High Flow Throttle Body
I did the installation work myself and took just about the amount of time Dinan
specifies for the job. This gave a noticable increase in power even at the lower
RPMs. The biggest difference, however, was in the way it sounded. At full
throttle and above about 2500RPM the new intake system makes a nice low growel
that sounds best when going under overpasses where you can hear it reverberate
around.
Quickie mod:
 One more quickie before round 2 was adding the front strut and rear shock tower
braces. These are aluminum cross members with spiffy carbon-fiber inlays which
bolt onto the towers. Installation is pretty straight forward, although the front
bar uses some counter-sunk holes for the nuts that can be difficult to get a socket
down in (not much clerance). The bars subtly changed the handling qualities and added a
marginal amount of body stiffness. These are a little over priced for what they
do, but for those looking for a little extra stiffness, and are willing to pay the
$700 or so for the pair, it adds a little to the "check this out" factor (no, we
aren't vain at all).
One more quickie before round 2 was adding the front strut and rear shock tower
braces. These are aluminum cross members with spiffy carbon-fiber inlays which
bolt onto the towers. Installation is pretty straight forward, although the front
bar uses some counter-sunk holes for the nuts that can be difficult to get a socket
down in (not much clerance). The bars subtly changed the handling qualities and added a
marginal amount of body stiffness. These are a little over priced for what they
do, but for those looking for a little extra stiffness, and are willing to pay the
$700 or so for the pair, it adds a little to the "check this out" factor (no, we
aren't vain at all).
Round 2 - Suspension and Exhaust:
Next came the exhaust and suspension work. For this I had Dinan do the labor.
While I could probably do the exhaust system, handling the springs wasn't a task
I was up to and I wanted it all done at the same time (what good is patience?).
This round of mods included:


The exhaust mods doubled the increase in performance and gives the car a slightly
lower note. The real music comes at high RPM under load (especially under those
overpasses) and the car now sounds more akin to those M3 racecars (though
a bit quieter). The new struts and shocks take out any amount of give you may (or
maybe not) have noticed with the stock components. Dinan adjusts the rear shocks to a
somewhat middle-of-the-road setting (they have to be removed to adjust them)
and I put the front struts at about 75%. The stiffer bars cut body roll by about
half giving the car a much more substantial feeling in the corners and make it a
little more predicatble. Overall the ride is noticably stiffer but not
uncomfortable (rides like a race car).
Round 3 - Brakes:
This round includes:

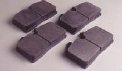 Carbon-Kevlar pads
I got the steel-braided Kevlar lines from AJ-USA, Inc. to replace the stock rubber ones. Installation took about 3 hours, but having done it now I could do it again in about an hour. The front lines run straight from the caliper to the rigid hydraulic line and take about 10 minutes to put on. The rear lines are a two-piece construction where the first half goes between the car and a short rigid line that lives on the backing plate of the brake assembly. The other half goes between that and the caliper. These are more difficult because you have to get all the angles right between the lines and get the wrenches around the suspension bits. Rears take about 20 minutes once you know what to do.
After bleeding the system and topping off with more ATE Super Blue I noticed that the pedal is marginally stiffer and feels a little more direct allowing somewhat better control. There's still a lot of travel before they actully start grabbing and I'm not sure what's causing this. Could be anything from how the master cylinder is built, construction of pedal linkage, or brake pad material.
After an initial round of confusion (they sent the wrong pads), I threw the Carbon-Kevlar pads on an boy did they squeak. When cold they didn't make much noise, but as soon as they got up to a 'normal' temperture they made more noise than a muni-bus. As part of breaking them in I went around doing a bunch of 0-30-0 cycles (accelerating to 30, then braking hard to stop). This gets the whole system really hot to the point where you can smell your brakes. Once up to this extreme temperature, they were nearly silent. Since I don't plan on running around with the brakes at max temperature all the time I'm going to keep these for track events and use normal (non-sqeuaky) compound brakes for everyday use.
Before leaving this subject, I should say a couple of things about the pads. First, at the limits of temperature, the carbon-kevlar pads faded to a point and then more or less provided a constant amount of stopping power (I could invoke ABS even with VERY hot brakes). This is compared to normal compounds which fade to the point where no amount of pressure will stop your car. Also, they seemed to cool back to full-efficiency faster allowing normal brake pressures to be used sooner after heating them up. Second, these brakes stop the car with less pedal effort. After taking the little squeakers off and putting the stock pads back on I noticed an increase in effort required to effect the same amount of stopping.
Overall I think these pads will be great for the track where the system will be operating
nearer the limits most of the time. (Plus, now that I've done it a few times, swapping the
pads only takes about 40 minutes.) I also think that using the ATE Super Blue does a lot
to avoid brake fade due to boiling the fluid.
Round 4:
I added 4-point harnesses (well, I got 6pt, but only installed lap and shoulder), euro (wide-body) AFM, an upgrade to Dinan Stage 4 suspension, camera mount and bar, and finally got my gForce R1s on 17x8 Breyton Competitions. We'll see how much this adds to the cornering... should make quite a difference in both braking and cornering abilities.
The harneses are made by AutoPower and I got them through AJ-USA. They are the cam-lock variety which means with a 1/4 turn either direction of the latch I can be out of the harness. I only had 4 of the 6 points mounted because I didn't feel like going through the added modifications necessary for adding the submarine belts. It requires modification of the under-seat heater ducting as well as a slit and stiching to be done to the thigh bolster accordian leather on the seats.
The Euro-AFM (Air Flow Meter) added a noticable (5%?) amount of power and with this came the Stage 3 Dinan chip and a little higher capacity fuel regulator. It makes for a much more powerful feeling car and straightens out the curve as the revs get above 4000 RPM. (It used to get a little soft above 4000 with the old Stage 2 setup.)
The Stage 4 suspension upgrade sets up for 3-degrees of negative camber in the front and a little extra negative camber in the rear. This made for noticably better turn-in and much better feeling through the corners. I used to dislike the understeer caused by the stock geometry setup and it seems like this made the car a lot more neutral.
I also got a camera-mount and mounting bar (goes between B-pilars). I made the first video at Thunder Hill (see videos of a good lap and a spin below). The mount has quite a bit of vibration, sometimes exceeding the 'SteadyShot' abilities of the HandyCam, but overall it makes a pretty good setup and watching videos of me driving and being able to go over the instruction has been a big help. I'm still looking for a wide-angle lens attachment to make this setup even better.
I also got the new BFG gForce R1 r-compound tires on 17x8 rims. I haven't had these on
the track yet, but this should get rid of a lot of the slower cornering speeds I've had
to maintain with stock tires (even though they were the kickass S-02s).
Bits 'n' pieces:
I changed the oil out for Red Line synthetic. I also drained the trasmission and put Red Line ATF in there (the M3's tranny takes ATF instead of 90W gear oil... go figure). The shifting seems a little smoother now, especially when cold. I've also changed the oil in the differential with the Red Line synthetic. The car is now 100% lubricated with Red Line so with as hard as I drive it, hopefully this will make it last a little longer. :) And maybe it's just me, but it seems like I got a little extra power out of going to Red Line.
I added a Steif bar under the engine. This is basically an X-shaped cross member that adds stiffness to the front chassis. I haven't had a chance to try it out on the track yet, but people say it makes a noticable difference. At the same time I did that, I reset the front sway bar from the default setting Dinan put it at (loosest) to the stiffest setting. This made a definate change in roll but I need to get it out on some twisties to see if it induces too much oversteer. The car pushed a little before, so we'll see where this puts it.
I put in a short-shift kit from Korman. It's an adjustable type where the ball
can be moved up and down the threaded lever by rotating it. This
shortened the throw by about 35% or so and gives a much more positive feel to
the shifting.
Obviously this increases the force necessary to change gears, but the
benefit of having a shorter throw outweighs this.
The shift assembly is a little noisier now, but not annoyingly
so - mostly in 2nd gear, although going through the gears now produces a 'snick'
sound. This shift-kit also makes the shifter sit about 3/4" further back so
in 4th gear especially it is almost too far back. This makes the shift into 4th
a little vague, but as I get used to the new feel, this probably won't be a
big problem. It also makes the reach into 3rd and 5th easier.
By the way, the Korman
adjustable shifter is a little over $200, far less than the $800 or more you
can shell out for a short-shift kit from ACSchnitzer (although I didn't get the
nifty Schnitzer shift knob).
Visual changes:
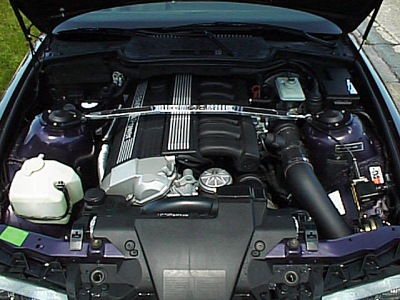
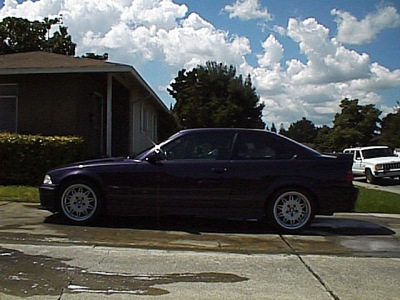
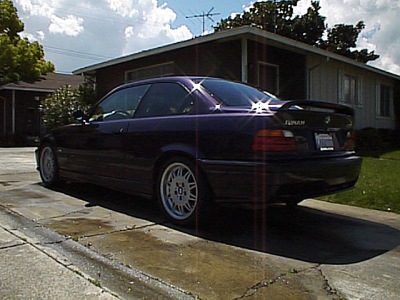
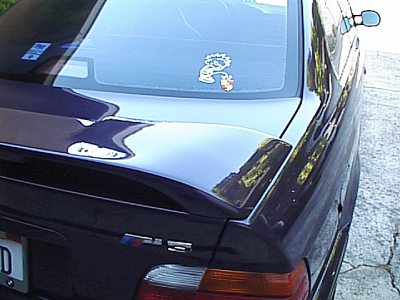
Under the hood the only changes you can spot are the new intake tube which runs from behind the left headlight to the airflow meter, the euro AFM, and of course the strut-tower brace. In the trunk you'll spot a similar bar running across about 6" behind the rear seats. Under the dust caps you'll find the adjustment screws for the struts. The front wheels are just noticably canted in at the top showing the Stage 4 negative camber. The exhaust tips are now two large stainless steel round pipes with "DINAN" engraved on them attached to a rectangular muffler (instead of the stock oval one). A closer look under the car will reveal the Steif bar, Koni shocks, new anti-sway bars, and the steel-braided brake lines. Oh, and of course there's a Dinan badge on the trunk lid further indicating this it not your standard issue 3-series (first BMW Motorsports got to tune it, then Dinan).
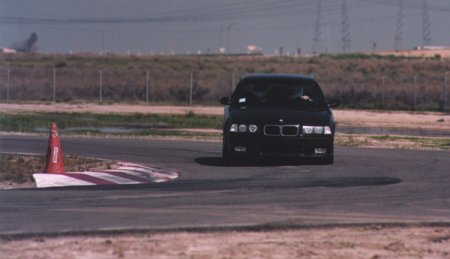
Right after Round 2 was completed I ran the car down to a BMW CCA high-speed driving school at the Buttonwillow Raceway. Here's a picture showing how little body roll there is now.
I've driven the car now at several tracks and the AJ-USA carbon-kevlar pads hold up extremely well. I'm now on my second set. The do indeed squeak too much for street use, but that's what stock pads are for. :)
If you own a BMW and aren't part of the
CCA,
go there and join now. Give them my number, 149617, as the person who referred you.
If you're in the Bay Area, you'll become a member of the
Golden Gate Chapter.
What's next:
Engine:
Pretty much done with the engine mods. I doubt I'll throw a supercharger in it since
they're pretty expensive and I'm pretty happy with the balance between power and handling
right now.
The only other thing which I might do is upgrade the mounts for the engine and
transmission. Korman Autoworks
has some heavy duty parts for these that minimize the amount of movement under hard
cornering and acceleration. They also have a swap-in oil pan and pump which removes the
problem in M3's of losing oil pressure in a braking left hand turn.
Dinan (and others) makes a light-weight clutch assembly that will go in once I finish grinding this one down (stock flywheels can't be resurfaced anyway, so as long as they're in there I might as well have a better system installed).
Future investment: ~$2400 for the mounts and pan, and ~$1200 for the light-wieght clutch assembly.
Suspension:
I'm pretty happy with how the car is set up right now as the Dinan Stage 4 suspension
makes the car handle very well. If I wanted to go to the next step, I'd install
some coil-over springs and struts in the front and go linear springs all
around. Also I could get beefier sway bars.
Future investment: $0
Tires:
I like the new
Potenza S-02's
a lot better than the
AVS Intermediates
that were on the car when I got it. The Potenzas are a lot more sticky (though they
only last about 6,000 to 9,000 miles depending on usage - I'm on my second set, the first ones lasted through 3 auto-crosses and 2 track events plus about 6,000 miles of commuting) and are
very soft.
If you remember those pink bar erasers from school, that's about how soft this rubber
feels, though it wears a little better. I think they're definately
worth the extra $80/per (even if you figure that's another $320/set to wear out twice
as fast).
Future investment: $0
Brakes:
I ordered some slotted euro rotors for the front and slotted stock rears. These should
help a little on the heavy braking. I'm on my third set of the carbon-kevlar pads
from track use. These pads work very well, I haven't had any complaints.
The cooling duct kits are coming down in price, so maybe I'll pick up one at some
point in the future. They replace the backing plate and hook to the existing through-the-bumper
cooling ducts to force ram air through the rotor.
Future investment: $1000 for the ducts
Interior:
I might add some racing seats (Recaro or Momo perhaps). I'm not
planning on installing a full roll cage or anything drastic like that.
I'm tempted to install the extra gauge cluster in the space below the OBC. The two definate choices here are oil temperature and pressure. As for the third, either EGT, CHT, or maybe water temperature (though there's already one of these on the dash).
Future investment: $1200 for the seats, ~$400 for the gauges
Total future investment: ~$6,200
Since I obviously can't afford to do this all at once and some things are of
arguable value, I'll probably just be doing the gauges, seats, and clutch assembly
(more or less in that order).
Going much further than that, and I might as well turn the thing into a race car, rip out all the interior and noise deadening material,throw in a roll cage, and go have some real fun (I've heard this removes about 700 pounds from the weight of the car). :)
Here's the collection so far:
Me just after blowing all my money
Coming around a turn at Buttonwillow
Engine compartment
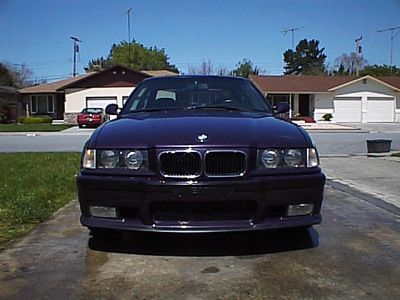
Head on
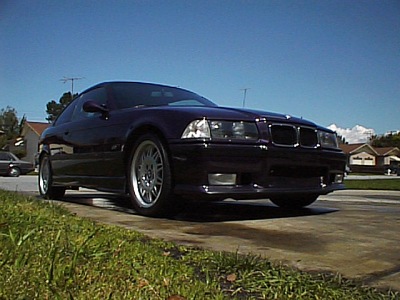
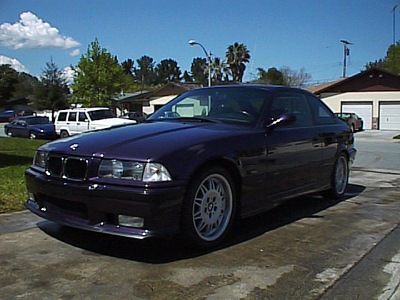
Front corner
Other front corner
Interior
On the outside looking in
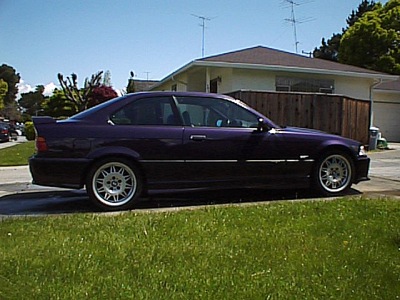
From the left
Backside
Rear corner
From the right
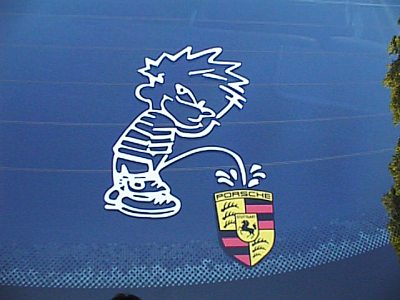
Porsche gets its just desserts.
Just to make sure you know what car this is on...
Videos:
A good lap around Thunder Hill (using the wide-angle lens) - 26.9MB/02:36/320x240x15fps
(Lo-rez version of the lap - 11.8MB/02:36/160x120x15fps)
Me spinning out at Thunder Hill in the rain (doh!) - 3.1MB/00:15/320x240x15fps
(Lo-rez version of the spin - 1.5MB/00:15/160x120x15fps)
A lap around Buttonwillow with fun in 11 - 29.1MB/02:12/320x240x15fps
(Lo-rez version - 10.2MB/02:12/160x120x15fps)
These are just ones found in the text, but collected here in alphabetical order for ease:
AJ-USA, Inc.
BBS Wheels
BMW CCA Headquarters
BMW CCA Golden Gate Chapter
BMW USA
Brembo
Dinan
K&N Filters
Korman Autoworks
Red Line Synthetics
Stevens Creek BMW
Tire Rack